FastStore Onboarding
This documentation is currently under development.
FastStore Onboarding app is a specialized tool designed to simplify the process of setting up a store, allowing you to focus on building your storefront without the hassle of complex configurations.
In this guide, you will:
- Gain a thorough overview of the FastStore Onboarding app.
- Learn how to create your FastStore project using the app.
- Have a Github repository and a live demo preview of your store by the end of this guide.
Accessing the Onboarding app
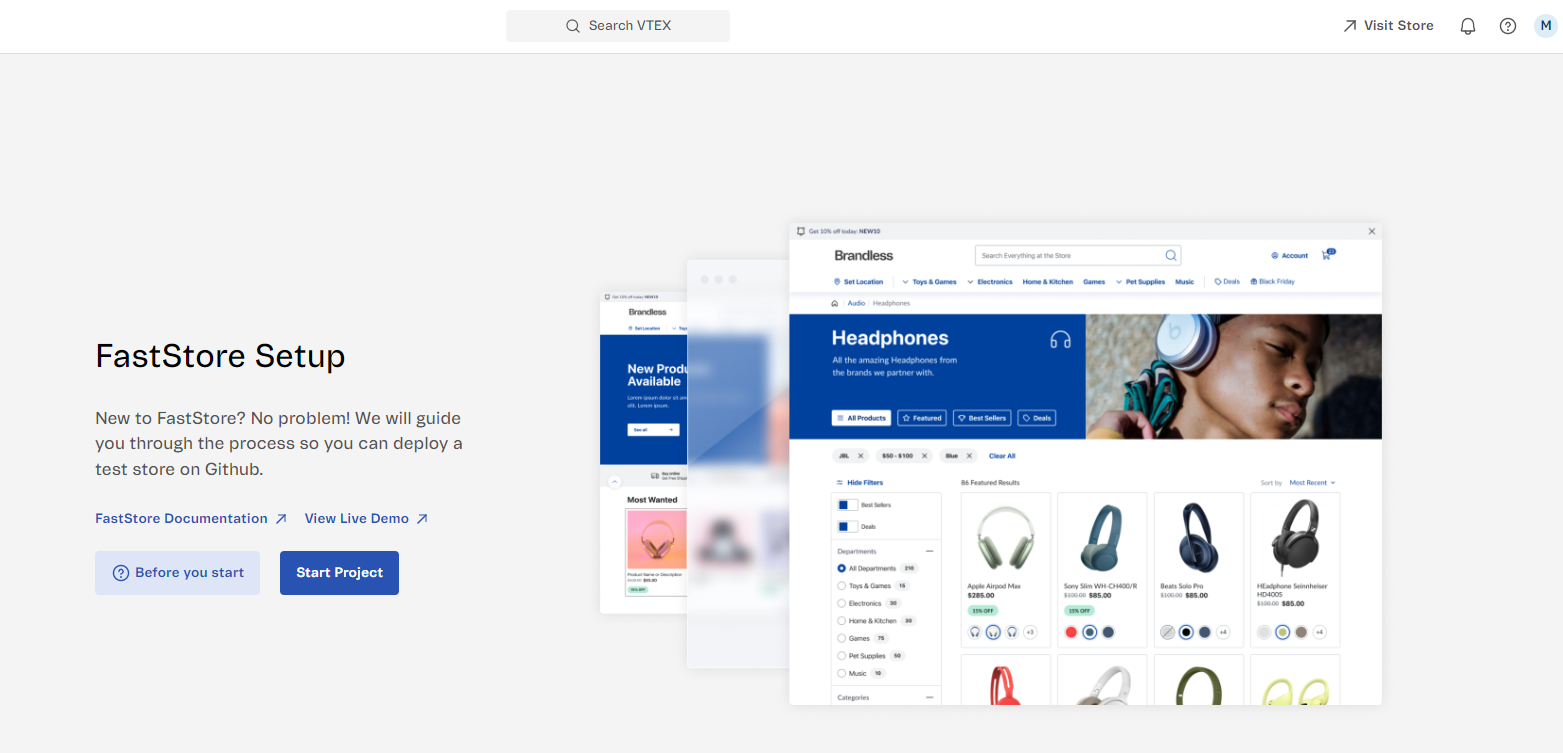
To access the app, go to the VTEX Admin and navigate to Apps > Installed Apps > FastStore. Take a look on the app's page overview and its available options

| Option | Description |
|---|---|
| FastStore Documentation | Access the FastStore Portal Documentation. |
| View Live Demo | Previews a live demo store. |
| Before you start | Opens a sidebar with FAQs about starting the project. Note that you have the option to create a catalog for your store if you haven't already. By clicking on Create Catalog, you will be taken to the Catalog section in the Admin.. |
| Start Project | Opens the first page to start creating a new FastStore project. |
Starting a new FastStore project
Now that you have an overview of the app, let's start the project.
Step 1: Setup & Create Project
- Click on
Start Project. - In the Setup & Create Project page, ensure to define the basic configuration for your store:
CMS Integration
The option available to use a CMS in a FastStore project is VTEX Headless CMS (opens in a new tab), VTEX's Content Management solution.
SEO Tags
| Field | Description |
|---|---|
| Title Tag | Type a keyword-optimized title for your store. For example: Buy Online with the Best Game Store - GameStore. In this example, we used the length limit of around 50-60 characters to ensure it is fully displayed in search results without being truncated. It is also written in a way that accurately describes the webpage's content. |
| Description Tag | Type a short description about your store, for example Shop online at GameStore, the best game store for PC, Xbox, PS4 and Headphones. Explore our wide selection and buy your favorite games today! |
| Title Template | For example Headphones - GameStore. |
| Site Author | type the name of the agency or person responsible for the storefront. |
Github Acesss
After creating the FastStore project repository, you will need to gain access to its repository. In this section, you must enter the GitHub username of the person who will be the repository owner.
Domain
Type the current store URL.
Google Tag Manager
Type your store's Google Tag Manager ID (GTM ID) associated with a GTM container that manages and organizes your store's tags.
Catalog
Define which catalog your store needs to be linked with.
After setting up the basic configuration for your store and reviewing it, click on Create to proceed to the next page, Deploy Summary.
Step 2: Deploy Summary
Once you have completed the setup for your store, the deploy process will start. This process includes creating a repository and creating a live store. Once the process is finished, you will have one of the following scenarios:
Repository and Live Store created
In this scenario, both the repository and the live preview of the store were successfully created. You now have the following options:
| Option | Description |
|---|---|
| Your Repository | Access the store's Github repository and start setting up and customizing your store according to your brand. |
| [Stores-Name] Preview | Preview your store's live demo. |
| Documentation | Access the FastStore Portal Documentation. |
| Storybook Components | Check out the native features and components. |
| Customization | Access the documentation on how to customize your store. |
| View Dashboard | Coming Soon! |
Now that your store is up and running, let's set up the development environment by following the step-by-step instructions in Setting up the Project.
Repository Created with Failed Live Store
In this scenario, the repository was created successfully, but the creation of the live preview failed. Click on View Log to understand and resolve the issue.
Once the issue is resolved, you will see the Repository and Live Store created scenario.
Repository Creation Failed
In this scenario, the repository was not created, and as a result, the creation of the live preview also failed. Click on Retry to initiate the deploy process again.
Once the issue is resolved, you will see the Repository and Live Store created scenario.
Next Step
Now that your store is up and running, let's set up the development environment by following the step-by-step instructions in Setting up the Project.